Before you begin
Enabling Cloud Projects for the Code Editor
Open the Earth Engine JavaScript Code Editor by going to code.earthengine.google.com.
If you access Earth Engine using a registered Cloud project, you may have to select it in the Code Editor user interface. To choose a project for your Code Editor session, click the login widget in the upper right to select or create a new project. You will be greeted with the following dialog. If you signed up for Earth Engine using your Google account for noncommercial use, you can use the Code Editor without a Cloud Project.
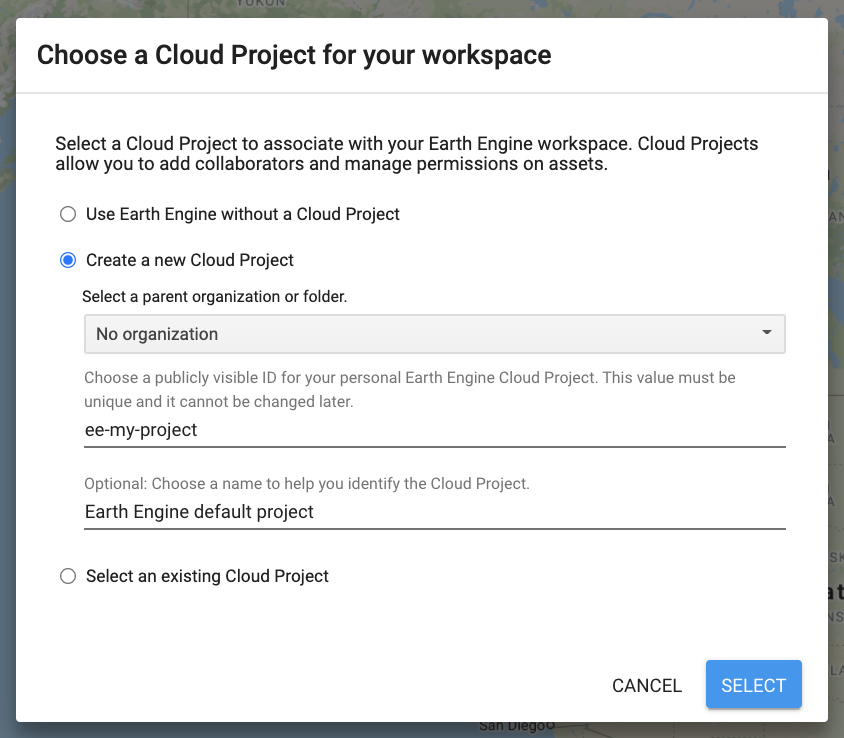
Earth Engine typically requires a Cloud Project to be associated with the session and you will need to either create a new Google Cloud Project, or use an existing one. If you wish to use an existing project, Cloud Projects to which you have access will be shown in the drop down dialogue. If you use the Code Editor to create or choose a project, the Earth Engine API will be activated on the project and an Earth Engine assets folder associated with the project will be created (i.e. the steps to activate the API and create an assets folder described in these instructions are performed for you).
You may also choose to set up a new project from the Code Editor. Projects created in the Code Editor may be managed in the Google Cloud Console. You can activate or deactivate the Earth Engine API from the Earth Engine API page on the Cloud Console. An asset folder associated with the project is also created to hold Earth Engine assets. You can access the folder using paths as described on this page.
Features of the Code Editor
Once you have selected a project you may be greeted with the Code Editor tour which will highlight the different features of the Code Editor. See the Earth Engine Code Editor page for more information about the features of the Code Editor.
Next Steps
- Follow the Earth Engine JavaScript Quickstart to get an overview of the Code Editor features and Earth Engine concepts.
- Try one of the JavaScript tutorials for the Code Editor.
- Review concepts of Earth Engine Cloud Projects, Assets and Access Control.