
To display your app in Google Drive when a user creates or opens a file, you must first set up a Drive user interface (UI) integration. Configuration is also required to list your app in the Google Workspace Marketplace.
Enable the Drive API
Before using Google APIs, you must turn them on in a Google Cloud project. You can turn on one or more APIs in a single Google Cloud project.
To get started integrating with the Google Drive UI, you must enable the Drive API. This gives you access to the API and the UI integration features.
In the Google Cloud console, enable the Google Drive API.
Set up Drive UI integration
- In the Google API Console, go to Menu > APIs & Services > Enabled APIs & services.
- At the bottom of the APIs & Services dashboard, click Google Drive API. The Google Drive API configuration page appears.
- Select the Drive UI integration tab.
- (Optional) Enter a name in the Application name field. The application name is displayed to users in the Manage Apps tab in Drive settings.
- (Optional) Enter a short, one-line description in the Short description field. The short description is displayed to users in the Manage Apps tab in Drive settings.
- (Optional) Enter a full description in the Long description field.
Upload one or more Application icons to display in a user's list of connected Drive apps and in the "Open with" context menu. Icons should be in PNG format with a transparent background. Icons can take up to 24 hours to appear in Drive.
To use Drive UI's "Open with" menu item, enter the URL to your app in the Open URL field. This URL is used by the "Open With" context menu.
- This URL must contain a fully qualified domain name;
localhostdoesn't work. - This URL should be accessible to the intended users of your application. If you have multiple application versions, such as one for public release and one for restricted release to select users, each version should use a unique URL. You can then create different app configurations for each version.
- You must verify ownership of this URL before you can list your app in the Google Workspace Marketplace.
- By default, a
statequery parameter is appended to this URL to pass data from the Drive UI to your app. For information on the contents of thestateparameter, see Thestateparameter.
- This URL must contain a fully qualified domain name;
(Optional) Enter default MIME types and file extensions in the Default MIME types and Default file extensions fields. Default MIME types and file extensions represent files your app is uniquely built to open. For example, your app might open a built-in format for layering and editing images. Only include standard media types and make sure they're free of typos and misspellings. If your app only opens shortcut or third-party shortcut files, you can leave MIME type blank.
(Optional) Enter secondary MIME types and file extensions in the Secondary MIME types and Secondary file extensions fields. Secondary MIME types and file extensions represent files your app can open, but are not specific to your app. For example, your app might be an image-editing app that opens PNG and JPG images. Only include standard media types and make sure they're free of typos and misspellings. If your app only opens shortcut or third-party shortcut files, you can leave MIME type blank.
To use Drive UI's "New" button and have users create a file with your app, check the Creating files box. The New URL and optional Document name fields appear.
- This URL must contain a fully qualified domain name;
localhostdoesn't work. - You must verify ownership of this URL before you can list your app in the Google Workspace Marketplace.
- By default, a
statequery parameter is appended to this URL to pass data from the Drive UI to your app. For information on the contents of thestateparameter, see Thestateparameter.
- This URL must contain a fully qualified domain name;
Enter a URL in the New URL field. This URL is used by the "New" button to redirect the user to your application.
(Optional) If you want your app to open Google Workspace-supported files, check the Importing box.
(Optional) If your app must manage files on shared drives, check the Shared drives support box. For further information on how to support shared drives in your app, see Implement shared drive support.
Click Submit.
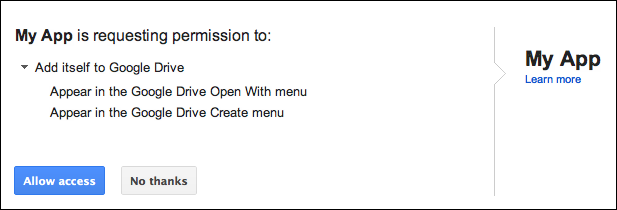
Request the drive.install scope
To allow apps to appear as an option in the "Open with" or the "New" menu,
request the https://www.googleapis.com/auth/drive.install scope to integrate
with the Drive UI. When requesting this scope, users receive a
dialog similar to this:
For more information about scopes you can request for Drive apps, and how to request them, see API-specific authorization and authentication information.
The state parameter
By default, a state parameter is appended to both the Open URL and the New URL
to pass data from the Drive UI to your app. This parameter
contains a JSON-encoded string with template variables and data about the
request to your app. The variables included depend on the type of URL used (Open
URL or New URL):
| Template variable | Description | URL application |
|---|---|---|
{ids} |
A comma-separated list of file IDs being opened. | Open URL |
{exportIds} |
A comma-separated list of file IDs being exported (used only when opening built-in Google documents). | Open URL |
{resourceKeys} |
A JSON dictionary of file IDs mapped to their respective resource keys. | Open URL |
{folderId} |
The ID of the parent folder. | New URL |
{folderResourceKey} |
The resource key of the parent folder. | New URL |
{userId} |
The profile ID that identifies the user. | Open URL and New URL |
{action} |
The action being performed. The value is
open when using an Open URL or create
when using a New URL.
|
Open URL and New URL |
The state parameter is URL-encoded, so your app must handle the escape
characters and parse it as JSON. Apps can detect the create value in the
state parameter to verify a request to create a file.
Example state information in JSON for a New URL
The state information for a New URL is:
{
  "action":"create",
  "folderId":"FOLDER_ID",
  "folderResourceKey":"FOLDER_RESOURCE_KEY",
  "userId":"USER_ID"
}
Example state information in JSON for an Open URL
The state information for an Open URL is:
{
  "ids": ["ID"],
  "resourceKeys":{"RESOURCE_KEYS":"RESOURCE_KEYS"},
  "action":"open",
  "userId":"USER_ID"
}
The IDs and resource keys are used to fetch file metadata and download file
content. Once your app has the file ID and an access token, it can check
permissions, fetch the file metadata, and download the file content as described
in the files.get method.
Related topics
An installed app must be able to create, manage, and open actions launched from the Drive UI. To learn more, see Integrate with Drive UI's "New" button or Integrate with Drive UI's "Open with" context menu.