
Once you've built your webhook fulfillment, deploy it to production and connect it to your Action. The following steps show you how to set up your environment to deploy to Cloud Functions for Firebase for production hosting. However, you can choose any web hosting platform that supports HTTPS requests and responses to host your fulfillment.
If you have already deployed your webhook to a web hosting platform, you can skip to Connect the webhook to your Action. Note that the final steps in the process below differ based on whether you use Dialogflow or the Actions SDK.
Deploy to Cloud Functions for Firebase
- Download and install Node.js.
Set up and initialize the Firebase CLI. If the following command fails with an
EACCESerror, you may need to change npm permissions.npm install -g firebase-toolsAuthenticate the Firebase tool with your Google account:
firebase loginNavigate to your Action project directory and initialize Firebase. You'll be asked to select which Firebase CLI features you want to set up for your Actions project. Choose
Functionsand other features you might want to use, like Firestore, then press Enter to confirm and continue:cd <cloud_function_dir> firebase initAssociate the Firebase tool with your Actions project by selecting it using the arrow keys to navigate the projects list:
After choosing the project, the Firebase tool starts the Functions setup asking you what language you want to use. Select using the arrow keys and press Enter to continue.
=== Functions Setup

A functions directory will be created in your project with a Node.js
package pre-configured. Functions can be deployed with firebase deploy.

? What language would you like to use to write Cloud Functions? (Use arrow keys)
> JavaScript
TypeScript
Choose if you want to use ESLint to catch probable bugs and enforce style typing
YorN:? Do you want to use ESLint to catch probable bugs and enforce style? (Y/n)
Get the project dependencies by typing
Yto the prompt:? Do you want to install dependencies with npm now? (Y/n)
Once the setup is completed, you'll see an output similar to the following:
✔ Firebase initialization complete!
Install the actions-on-google dependency:
cd <cloud_function_dir>/functions
npm install actions-on-google
Get the fulfillment dependencies and deploy the fulfillment function:
npm install
firebase deploy --only functions
The deployment takes a few minutes. Once completed, you'll see output similar to the following. You'll need the Function URL to enter in Dialogflow.
✔  Deploy complete!

Project Console: https://console.firebase.google.com/project/exampleproject-123/overview
Function URL (cloudFunctionName): https://us-central1-exampleproject-123.cloudfunctions.net/cloudFunctionName
Connect the webhook to your Action
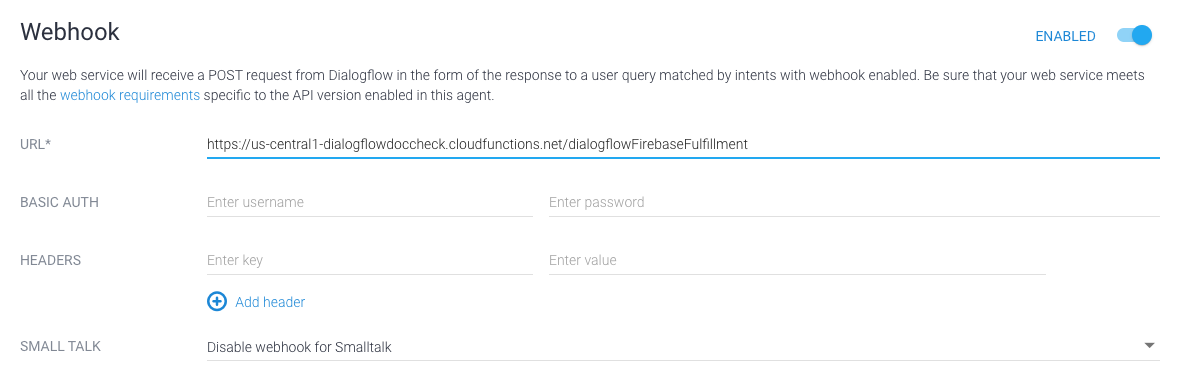
If you're using Dialogflow: In the Dialogflow console, go to Fulfillment, toggle the Webhook button to ENABLED, and replace the url in the URL field with your Function URL.
If you're using Actions SDK: Create an object
inside the conversations object to declare your fulfillment in your Action
package:
{
  "actions": [
    {
      "description": "Default Welcome Intent",
      "name": "MAIN",
      "fulfillment": {
        "conversationName": "myFulfillmentFunction"
      },
      "intent": {
        "name": "actions.intent.MAIN",
        "trigger": {
          "queryPatterns": [
            "talk to myFulfillmentFunction"
          ]
        }
      }
    }
  ],
  "conversations": {
    "myFulfillmentFunction": {
      "name": "myFulfillmentFunction",
      "url": "https://us-central1-myprojectname-ab123.cloudfunctions.net/cloudFunctionName"
    }
  },
  "locale": "en"
}