
add-ons require authorization from the user before they can operate. This is true of both published add-ons you installed from the Google Workspace Marketplace and add-ons you are developing yourself.
Authorizing published add-ons
After you install a published add-on, the authorization flow begins immediately:
- You are prompted to Choose an account install the add-on to.
- You are then presented with the list of authorizations the add-on requires to operate, so that you know what it attempts to do. Review this list carefully, and if you still wish to grant authorization, click Allow. This enables the add-on for use.
- You can now run it from the host application it extends. If the application was already open in a browser tab, you may need to refresh the tab before the add-on becomes available.
If the add-on you've installed is later updated and requires additional authorizations you have not yet granted, you are prompted to provide those permissions the next time you use the add-on.
Authorizing unpublished Google Workspace Add-ons
Unpublished add-ons don't have the same authorization flow as published add-ons because they aren't listed in the Google Workspace Marketplace yet. After installing an unpublished add-on, you aren't immediately asked to authorize. Instead, the authorization flow starts when you first attempt to use the add-on.
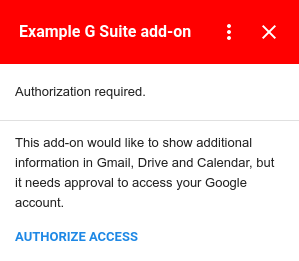
When an add-on is run, it determines if any user authorization is needed. If authorization is necessary, the add-on presents an authorization card. Authorization is always required the first time an add-on executes, and may also be required if a new version of the add-on uses a service not previously authorized. The Authorize Access button provides a dialog window for the user to Allow or Deny authorization for the add-on.
Authorizing non-Google services for a Google Workspace Add-on
It's possible for a Google Workspace Add-on to connect to a third-party service that itself requires authorization. Google Workspace Add-ons that connect to such services require two separate actions from the user:
- Authorization of the add-on itself when the add-on is installed or first started.
- Authorization of the non-Google service when it is first accessed.
If a Google Workspace Add-on you are developing needs to access a non-Google service using OAuth, you must configure the connection for that service when building the add-on.
When authorization of a non-Google service is required, the Google Workspace Add-on presents the user with an authorization prompt card for that service. You can customize this authorization prompt if you wish, or use the default card.
For more details, please refer to the Connecting to non-Google services guide.
Third-party conferencing systems
Google Workspace Add-ons that extend Google Calendar can also add additional conferencing solutions that let users select a third-party conferencing system when editing Google Calendar events. If your add-on provides conferencing options that require the user to log into them, your add-on must give the user the ability to do so.
If a user attempts to create a conference with your add-on without a necessary
log in, the conference solutions's onCreateFunction method
should return a
ConferenceData
object containing an
ConferenceError
with an
authentication URL.
Upon receiving this object, Google Calendar creates a LOG IN button in the event edit UI that links to the authentication URL the add-on provides. Users can then use this button to log into the third-party system prior to using the add-on further.
See Creating third-party conferences
for more details on handling authorization using ConferenceError.
Authorizing unpublished Editor Add-ons
It's a best practice to test Editor Add-ons as you develop them. The authorization flow is identical to that for published Editor Add-ons, except that the flow starts when you first attempt to test the add-on. If you later retest the same add-on, you aren't prompted for authorization again.
Unauthorizing add-ons
When developing add-ons, it can be useful to unauthorize them so you can retest the authorization flow.
You can unauthorize an add-on by doing the following:
- Open your account security console.
- Locate and click the add-on you wish to unauthorize.
- Click REMOVE ACCESS.
When you run the add-on again after unauthorizing it, the authorization flow is presented again.